Build Custom Keyboard: The Complete Guide (2023)
Want to buy a keyboard, but it costs big bucks?
Don’t worry!
With this guide, you can easily customize a keyboard as you desire.
Let us dive into the ocean of tips and tricks to help you to build custom keyboard.
What Do You Need to Build a Custom Keyboard?
Look for the following equipment to build a keyboard that will meet your expectations.
Required Tools:
- Soldering Iron and Accessories
- Screwdriver
- Switch Puller (Used for removing switches from boards.)
- Keycap Puller (Effective in removing keycaps.)
- Switch Opener (Used when filming or lubing switches.)
- Small paint brush and Switch Lube (To lube up the switches.)
- Tweezers (To hold tiny parts. It Is also essential to test the PCB.)
- Dielectric grease.
- Bandaids (For customizing a bandaid stabilizer mod.)
- Sound dampening foam (If performing foam mod., This is optional).
1. Round Up On The Type Of Keyboard You Want To Create
The first step is researching the keyboard you want.
The research will include different customization you want in your keyboard. Mentioned below are a few things to consider when choosing the keyboard you want to build:
- Size and Layout
- RGB & Backlighting
- Wireless or wired keyboard
- Investment
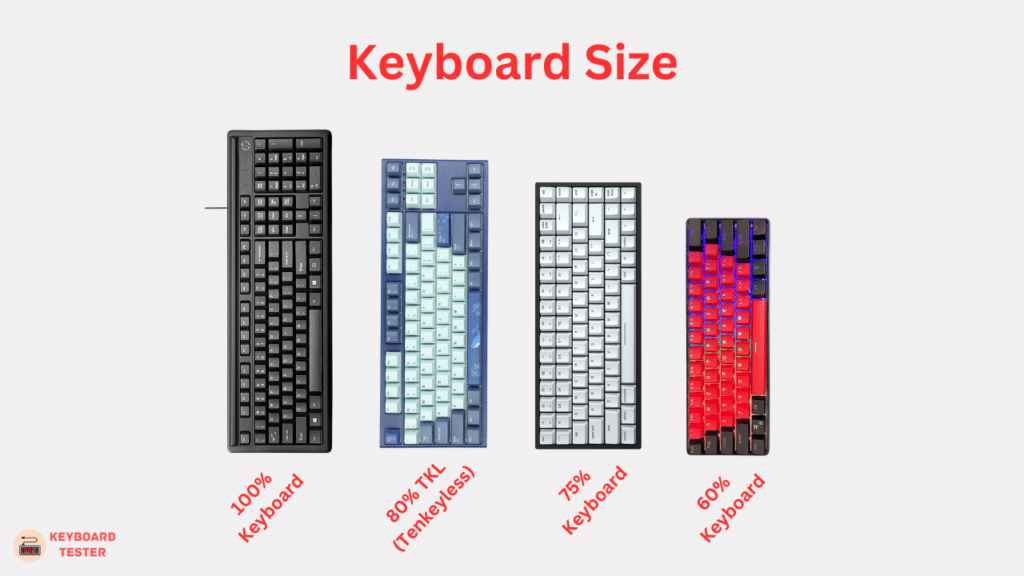
2. Size and Layout for a keyboard you want to build
Don’t know what size of keyboard you can choose from? Don’t fret! Read further to know some standard keyboard sizes.
100% Full-Sizes
As the name suggests, full size is the keyboard’s most significant size. The full-size keyboard also comprises a number pad on the board. This is placed on the right side of the keyboard.
80% TKL (Tenkeyless)
This is slightly shorter than the full-size keyboard; the reason is this keyboard does not have a 10-key number pad.
75% Keyboard
75% keyboard has the same layout as the 80% keyboard. The exception is that 75% has no dead space. This means it has compact keyboard layout with the keys very close to each other.
60% Keyboard
60% keyboard is a people’s favorite, amassing popularity for its compact size. These keyboards do not have a function row and exclude the arrow keys.
RGB and Backlighting
Are you someone who likes your keyboard to light up?
Several keyboards come with pre-installed RGB. You can, however, customize the effects and colors to your fancy.
Wireless vs Wired (along with available USB ports)
Not all keyboards have pre-installed Bluetooth capabilities.
Therefore, it is up to your wants and needs. Because several keyboards come with a 2.4 gigahertz dongle. However, the dongle is not as efficient as Bluetooth.
You can make things fun by customizing the cords using a wired keyboard. You either use coiled cables or go for colorful cords.
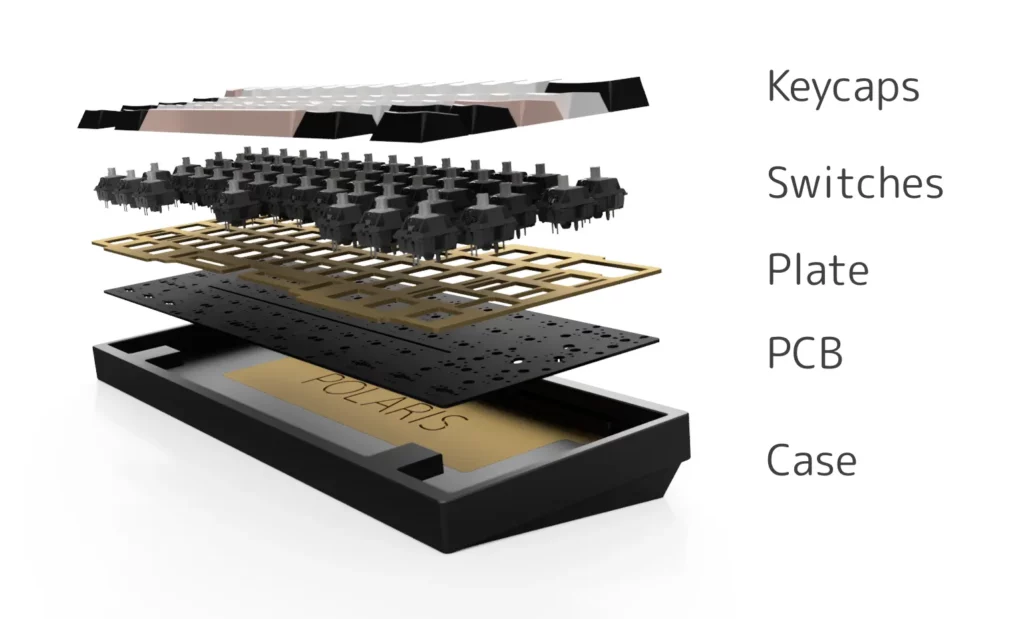
3. Put Together The Parts To Build Your Keyboard
If you have picked out the size and features of your custom keyboard, you’re ready to shop for the different components.
Here, we will look at individual pieces of the keyboard:
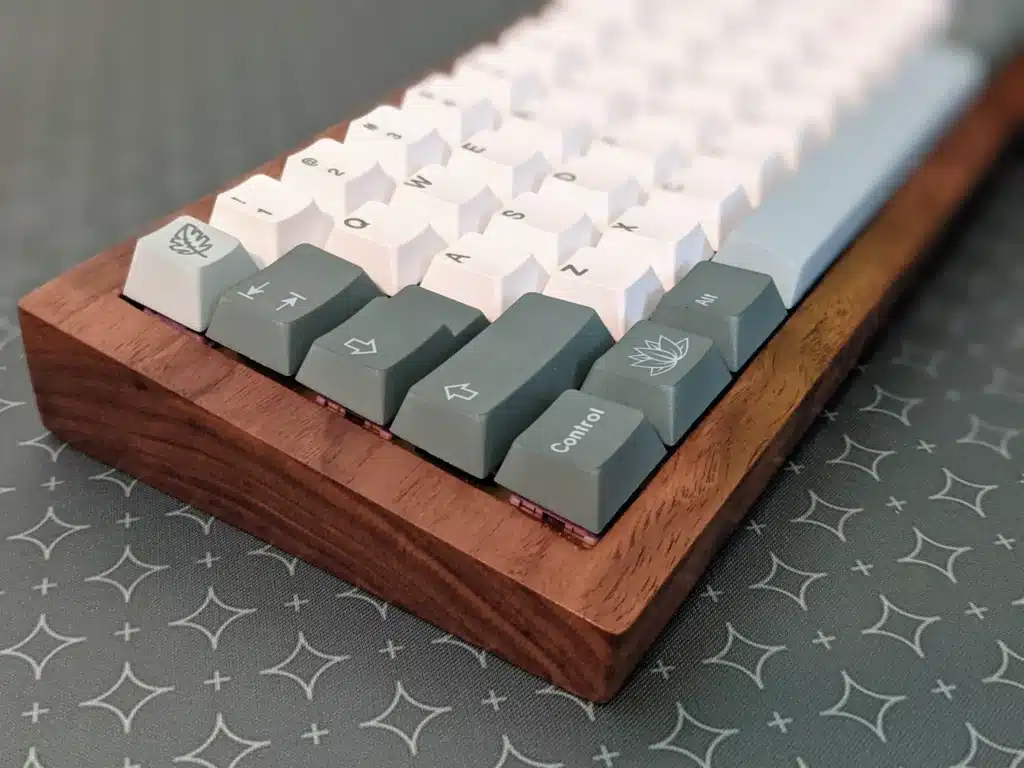
Keyboard Case
Consider the following material before purchasing the keyboard’s body.
| Material Required | Description of the material |
| Plastic | It is the cheapest alternative. A plastic case will be both lightweight and sturdy. It will get easily scratched. |
| Aluminum | It is expensive, but the good part is that it is more robust and durable. However, an aluminum case sounds hollow. |
| Acrylic | Shares similarities with plastic cases. They are more transparent and allow more RGB light to penetrate. Not as sturdy as aluminum, but it will work fine. |
| Wood | Higher-end cases, yet beautiful. |
Before you mount your case, pay attention to the following aspects.
- Tray mount (most conventional mount)
- Top Mount
- Plateless mount
- Bottom Mount
- And GASKET mounts (the most chosen mount because they help dampen the sound and give a nice feel).
The above points will make it easier for you to mount your case.
It will also give you a clear picture of how the PCB attaches to the case.
Remember, how your PCB attaches to the case varies from keyboard to keyboard.
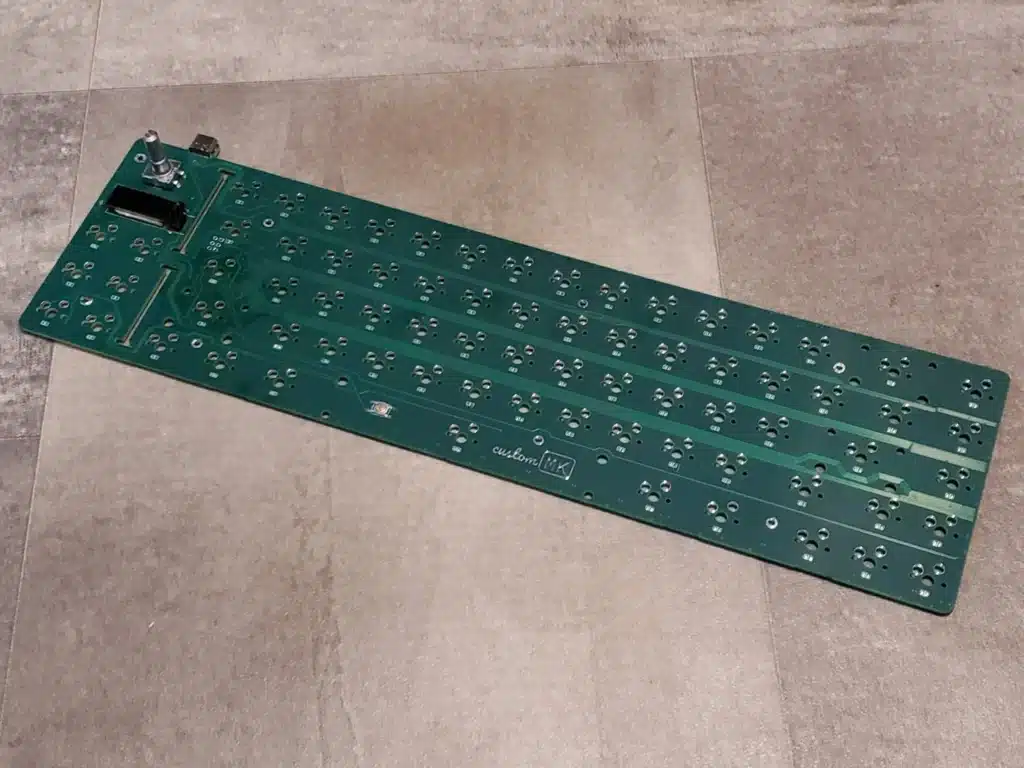
4. Printed Circuit Board or PCB
A PCB shares a similar appearance to the motherboard of your keyboard.
The switches will connect at the top while the USB cable will be plugged in.
To assemble a keyboard, choosing the right PCB is essential. Consider the following points before choosing a PCB.
- Compatibility with your keyboard case
- Hot-swappable vs. Soldered
- The layout of the PCB
- Features like RGB & USB Ports
Compatibility
First things first. Ensure that your PCB and the case are compatible.
Check the mounting style and ensure the PCB screws properly into the case. Never force a PCB into an incompatible case.
For example, you can not screw a 75% PCB into a 50% or 60% case.
5. Hot-swappable vs. Soldered: A crucial choice
| A hot-swappable PCB | This allows you to attach and disconnect the switches easily. To attach- snap in your switches. To disconnect, use a switch puller. The PCB removal will take 1-2 seconds. These usually come in standard layouts. |
| A non-hot-swappable PCB | Requires soldering of the switches. The process takes more time than a hot-swappable PCB. This is a long-lasting and permanent solution. To remove the switches, all you have to do is desolder them. However, this will make you take the whole keyboard apart; the good thing- the “standard” PCBs allow more modification. So, use these PCBs whether you want a split space bar or some weird configurations. |
RBG Backlighting, USB ports, and firmware support
Additional features, such as backlighting and ports, are listed on the product page.
Therefore, check PCBs to look for the feature you want.
Mounting Plate
For most keyboards (mechanical), a plate sits on top of the PCB.
This is a stiff plate that works as a base for the switches. These mounting plates come in various materials, such as polycarbonate, aluminum, brass, etc.
Before buying the plate, ensure it is compatible with your PCB and case.
Look at the items’ sales pages to know if they are compatible. This will give you an insight into which components match the PCB/plate/case.
Keyboard Stabilizers
Stabilizers help provide additional support to the larger keys on your keyboard. These are effective when a single switch fails to support larger keys.
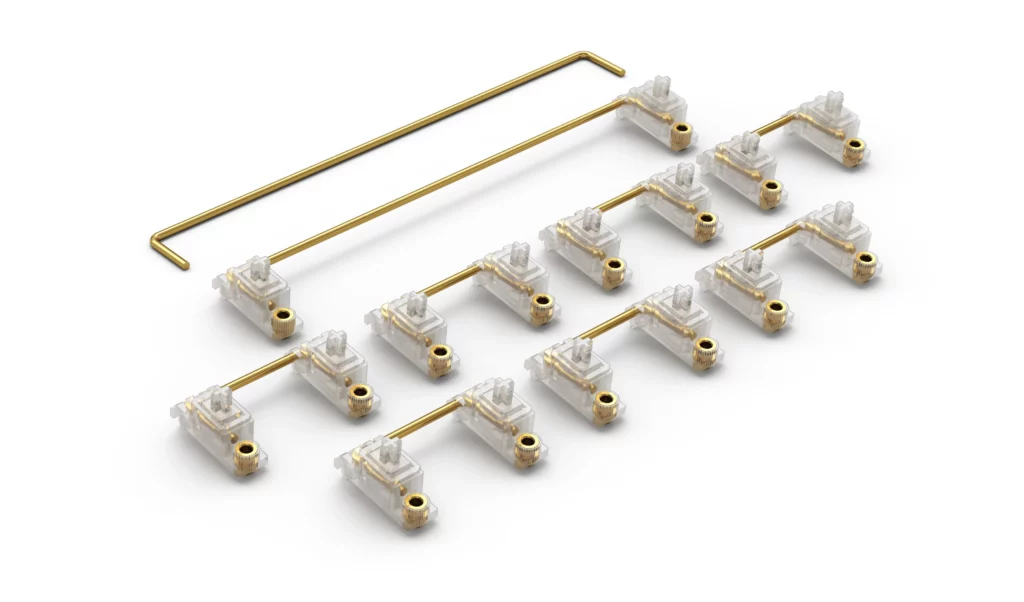
A few common stabilizers you might have heard about are:
- Space bar
- Enter key
- Shift key
- Esc key
- Ctrl key, etc.
The stabilizers can be purchased in little packets based on your keyboard’s size.
A keyboard with a different layout will have a different sized stabilizer. Before buying stabilizers, ensure they suit the plate/PCB well.
Below are various mounting options you can use:
- Screw-in stabilizer
- Plate-mounted
- Snap-in
| Type of Stabilizer | Description |
| Screw-in stabilizer | These Are the most commonly used and “stable” stabilizers. Which means they rattle less and are great for typing. As the name suggests, these screw-in stabilizers screw right into your PCB. |
| Plate-mounted | Plate-mounted stabilizers are attached to the plate, not the Printed circuit board or PCB. However, these plate-mounted stabilizers aren’t very stable. They often shake or rattle on use. |
| Snap-in | Compared to screw-in stabilizers, these stabilizers snap-in. However, they are not very secure and are rarely preferred. |
Tip: Going for the hot-swappable PCB? If yes, then go for plate-mounted stabs. Remember, compatibility is essential.
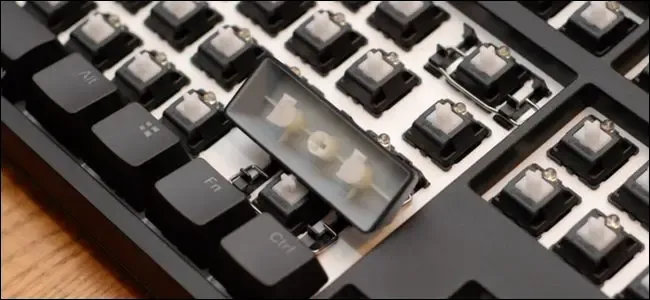
6. Keyboard Switches
Wondering what are keyboard switches?
Switches help connect the keycap to the PCBs. Switches have a box-like appearance that is responsible for triggering key activation.
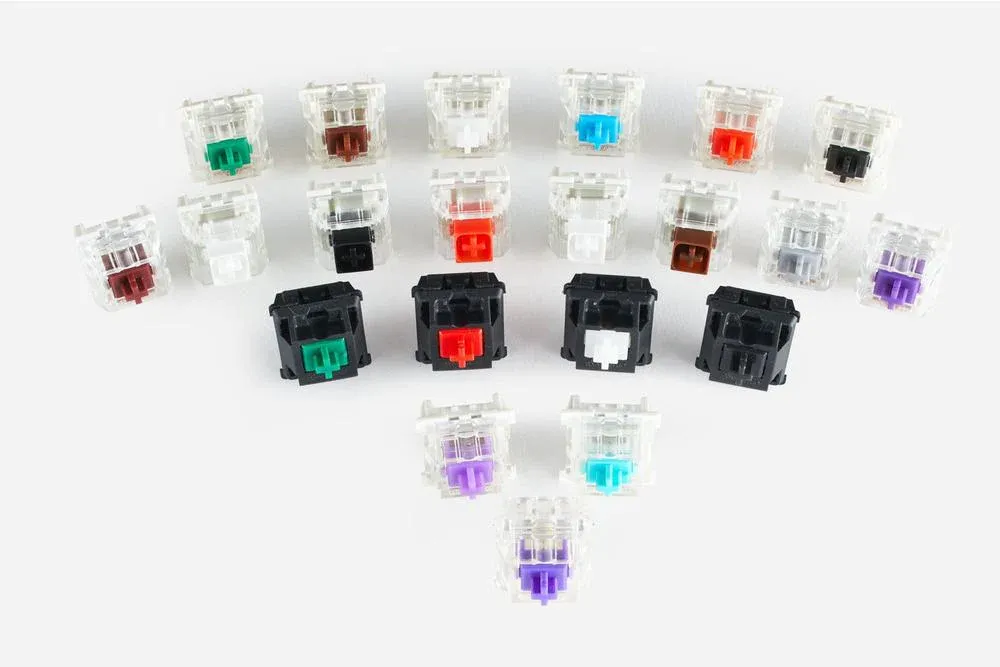
Switches are referred to in terms of colors and have numerous parts. A few parts and color codes are as follows:
1. Stem: These are color-coded by names. For example, “red switches” will have a red stem. The stems are usually connected at the bottom of a keycap.
2. Spring: Springs help provides resistance when the key is pressed down.
3. Housing: In the outer part of a switch, there are 2 housing – a top housing and a bottom housing. When lubing the switches, the housing is separated to expose a spring and stem.
Switches are customizations you can do when building a keyboard. This will elevate the sound and feel of the keyboard.
Here is a comprehensive switch guide to getting you the best switches for your keyboard.
| Types of Switches | Appearance | Color | Sound/Feel |
| Linear switches | Smooth feel (both down and back up) | Yellow, Red, Black | Has a softer feel |
| Tactile | A tiny bump appears midway across the keystroke. This will give you tactile feedback signifying the key is activated. | Clear or brown | A loud “clack” sound that is very clear. |
| Clicky | A tiny bump similar to tactile switches. | A slightly louder clicking sound. |
Tip: Start with a tactile switch if you’re unsure of choosing a switch. The brown one! However, there is no straight right or wrong. Because the sound and feel are a personal preference, keep experimenting!
7. Keycaps:
Keycaps are the easiest and most efficient way to customize your keyboard.
They usually have plastic cases and come in various styles and designs. But how do you know what is the right keycap for your keyboard?
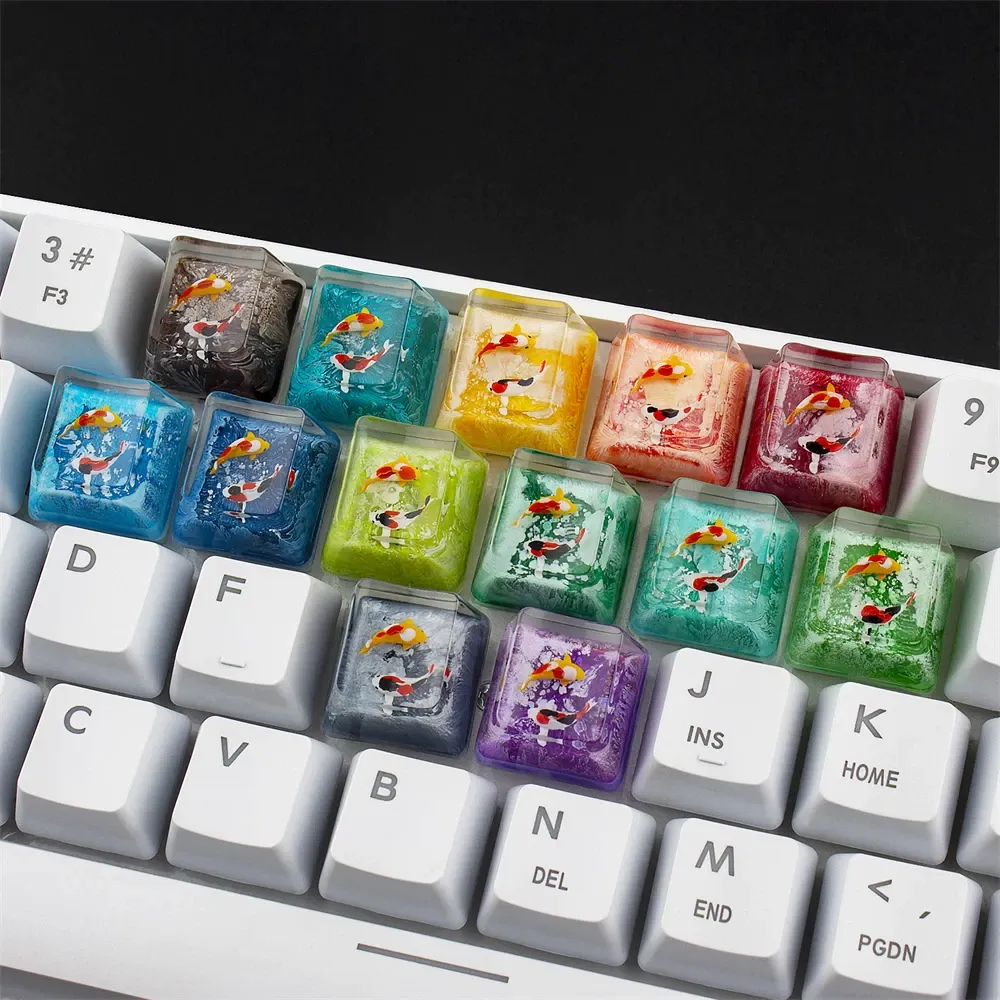
Below are a few points that will make it easier for you to choose an apt keycap.
- The Design
- Material – Plastic- ABS (Smooth, shiny, and cheap), and PBT (textured, durable, and more expensive).
- Profile – “Profile” usually signifies the “shape and height.”
Some standard profiles are as follows:
| Profile | Description |
| SA | The tallest keycaps with a curve. Keycaps with the letters “SA,” for example, ASA or DSA, will usually have an on-top curve. |
| OEM | Medium height and the keycaps have a slanted top. |
| Cherry | Most popular keycaps with medium to the low height. |
To get the right keycap:
- First, go for keycaps centered on a design that meets your requirements.
- Next, recheck the profiles. A high profile will give you a bad experience while you type on.
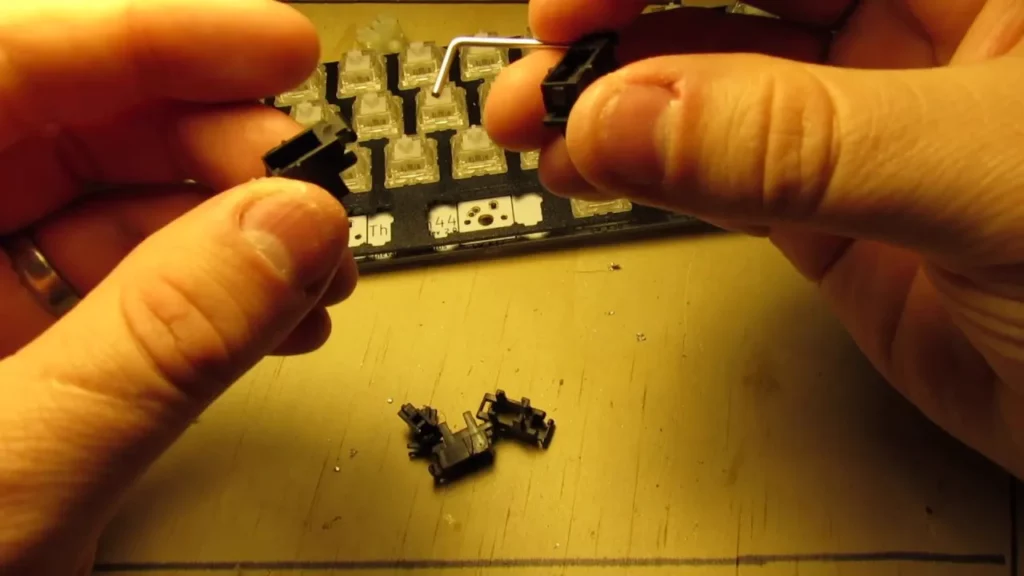
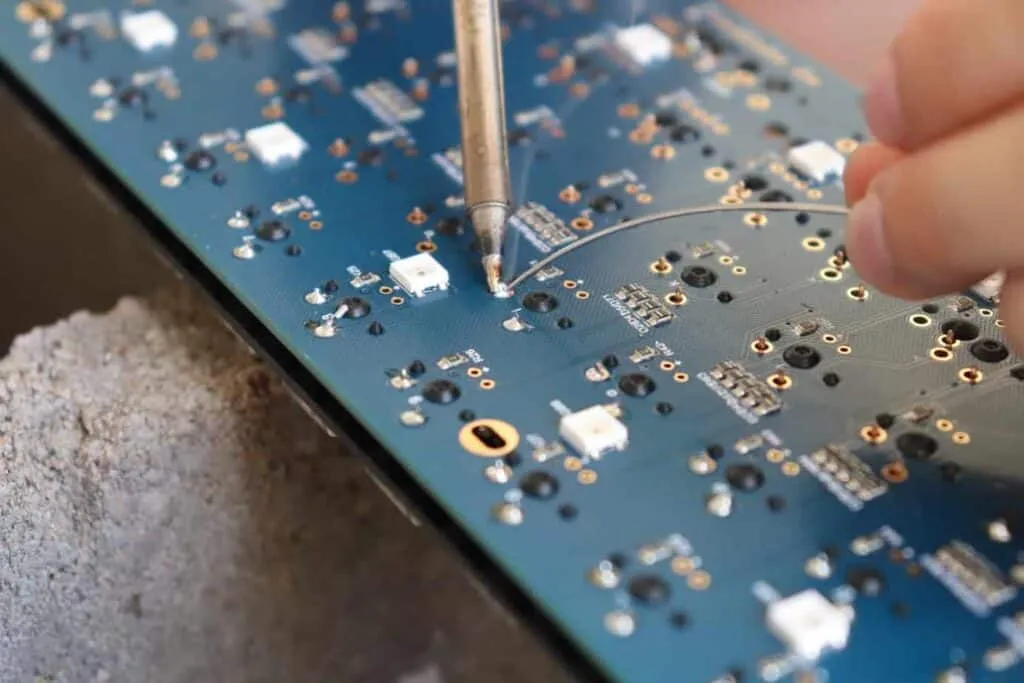
8. Unpack the components to test your PCB
Once you have assembled all the components, it is time to run the test. Start by plugging in your PCB to test it.
- Grab a pair of tweezers and a USB cord.
- Plug your USB cord and PCB into your system.
- Next, Open keyboard tester to proceed with circuit testing phase.
- For each key, put the tweezer on each side of the PCB “pads”. PCB pads are 2 diagonal holes where the switch pins are inserted.
- If the key cannot activate immediately, try again while moving the tweezers around.
- If the keys do not activate, you may have a faulty PCB. Return it and get a new one.
- If the key activates, proceed to test every key. If the testing goes well, move to build the keyboard.
9. Install Stabilizers > Optionally Lube or Clip Them
Stabilizers support the larger keys like the space bar, enter key, shift key, etc.
The number of stabilizers required and the layout/size of the keyboard will determine the size.
Most stabilizers contain different parts, such as:
- The Housing
- The Bar
- An insert (similar to a switch stem)
However, before installing the stabilizers, let us look at more common modifications. Some of the modifications where we will be throwing light are:
- Bandaid mod (You can skip this step)
- Clipping the stabilizers
- Lubing the stabilizers
The band-aid mod
The stabilizers can go down and smash into the PCB on several keyboards.
The bandaid mods help prevent this mishap. It does so by adding tiny adhesive material on the spots likely to get hit by the stabilizers.
Tip: If you are on a budget, skip this step. Because the bandaid mods do not make that big a difference, or you can also check if the stabilizers hit the circuit board. If they do not hit the board, you are free to skip the mod.
Follow the process to add the bandaid mod:
- Grab a few bandaids (fabric ones).
- Cut out a few tiny strips from the sticky parts (not the center part).
- Carefully place them where the stabilizers end.
- Seal them properly by adding the lube on top.
Clipping the stabilizers
Next is to clip off the stabilizers. And no, not the entire stabilizer. There are a few parts that need not be attached.
If left on, they can cause wobbling and shaking. Clip off the extra part to make the keyboard sound and feel better.
Follow the following steps to clip the stabilizers:
- Flip the stem and spot out the two forked feet.
- Using flush-cutters or nail clippers, cut the forked feet hanging out. This will give your stem a flat surface.
- Use lube to coat all 4 sides of the stem.
- Once done, insert the stem on the housing shell.
Lubing the Stabilizers
Lubing is essential as it prevents different parts from rubbing into each other. This will make the keyboard function smoothly.
When lubing the stabilizers, it is essential to use dielectric grease. When lubing switches, even a cheat lube will work fine. Follow the following steps to lube the stabilizers:
- Take apart the stabs.
- Start with lubing the stabilizer housing insides (with a paintbrush). Remember, do not apply lube to the outside shell of the housing.
- Push the stem back into the housing shell.
- Next, start lubing the stabilizer bar. Cover the end of the stem that goes in the housing shell.
- Remember, we aim to make a fence between the plastic and the wire’s end. Avoid using too much lube, as it will slow down the stabilizer.
- Once done, reinsert the metal wire into the stem and screw or snap the housing.
Once you have screwed or snapped the stabilizers onto your PCB/plate, let us proceed.
10. Install Your Switches (Lube and Film Them if required)
Before diving into installing the switches, let us review 2 (optional) mods:
- Lubing
- Filming
Tip: Do you have a hot-swappable PCB? Then you can remove and mod the switches later.
Lube the switches
Lubing different parts aims to prevent them from rubbing against each other. This will help reduce friction and make typing smoother with a better sound.
Follow the following steps to lube the switches:
- Start opening your switches (this can take hours as it must be done 1 by 1).
- Next, set apart the spring, stem, and housing units.
- Gently apply the lube to the insides of the bottom housing.
- Also, apply the lube to the spring and place it in the bottom housing.
- Next, begin lubing the stem.
- Proceed to place the stem on the spring.
- Lube the inside walls of the top housing as well (optional).
- End the lubing process by assembling the switch.
Tip: Lubing the switches can take time. However, you can speed up the process slightly by “bag lubing.” Use a Ziploc bag and put springs that need to be lubed. Add some lube to the bag and give the bag a good shake.
Filming the switches
A switch film comprises a tiny part of a plastic material. Insert this material in between the top housing and bottom housing of a switch. This will help reduce wobble while typing.
Tip: Have a hot-sap PCB? Prioritize assembling the keyboard before putting in the switches.
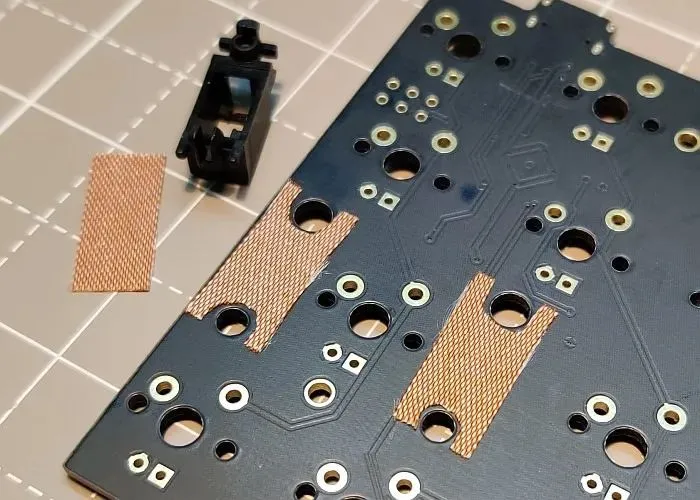
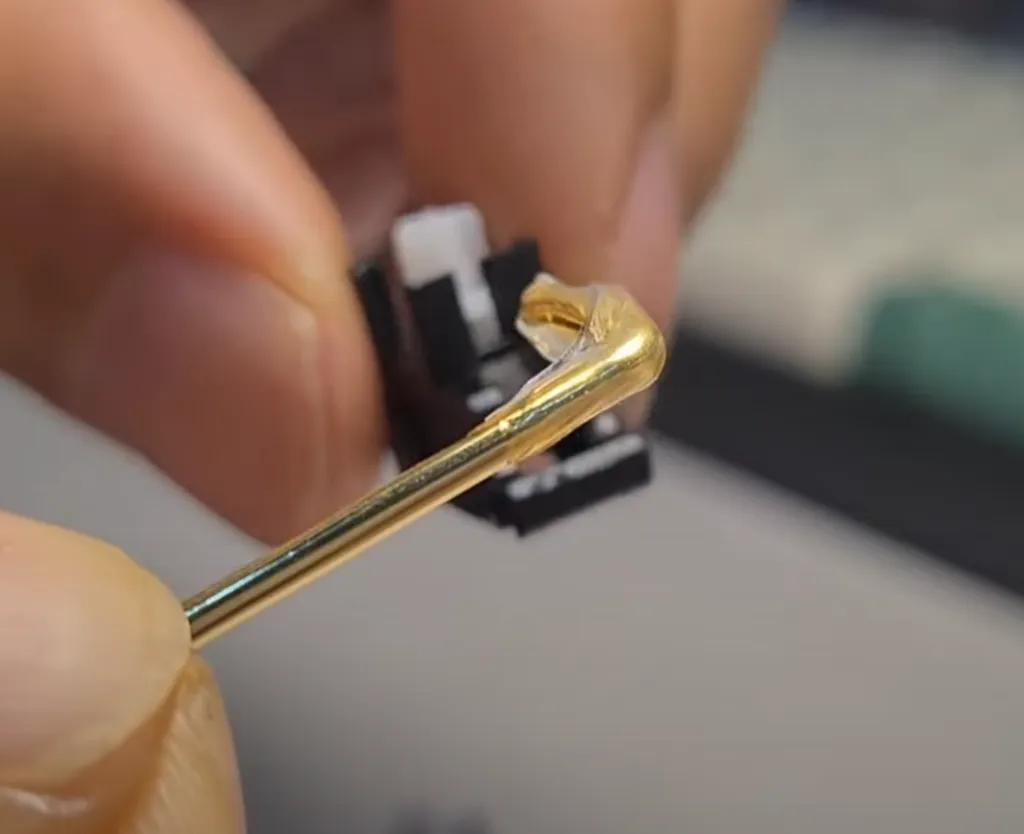
Soldering the switches
Have a non-hot-swappable printed circuit board? Start by connecting the following parts:
- Switches
- Plate
- PCB
Follow the steps to proceed:
- Align the PCB and plate. You don’t have to be precise with this step.
- Next, begin by inserting each switch into the plate. Make sure the switch pins go into the PCB without bending.
- Once all the switches and components are mounted and lined up, solder them together.
- Once done with the soldering process, plug in your PCB and assess the switches.
- In case you messed up any switch, de-solder it right now.
11. Install the sound dampening foam (non-compulsory)
You will hear an echo if you have “dead space” or air inside the keyboard.
Or the typing will sound hollow. To prevent this, add sound dampening foam to your case. This will effectively decrease the reverberation, making the sound better.
Where to add the foam? You can add the foam in 2 places:
- In between the PCB and the case.
- In between the plate and the PCB.
Tip: Although there is a debate about which foam to use, neoprene foam is better if you are on a budget.
Tip: Pay special attention to the vertical space when laying the foam. Using a super thick form will make it difficult for the PCB to fit in.
12. Assemble the Plate and PCB Into the Chosen Keyboard Case
Installed the foam along with the other parts of your keyboard. If yes, then let us proceed to reconstruct the keyboard case.
This step involves 2 key aspects:
- Mounting the plate and the PCB within the bottom of the case and lining them together.
- Screwing the components together.
13. Install the keycaps
The next step is to press the keycaps firmly onto the switches. However, this can be tedious if you don’t have all the key placements memorized. Use a reference picture to make it easier.
Proceed by pressing the keycaps on the switch stem. Make sure to press the caps firmly to prevent any wobble or scratchiness.
14. Program Your Backlighting/RGB and Keyboard (Optional)
With all the hard work, why not light the keyboard up?
You may not want to miss out on customizing the RGB and backlighting. Two ways can help you customize the lighting:
- With the help of software that comes with the keyboard.
- Through your PCB (if it supports it).
- With the help of the keyboard itself.
If your keyboard supports programming the lighting, you will get shortcuts on your keyboard. The shortcuts can be for:
- The light effects.
- The speed of the light effects.
- The colors that are displayed.
Check the keyboard’s instructions for a roadmap to program the keyboard lights.
Frequently Asked Questions (FAQs)
Q1. Is it better to build your keyboard?
Ans. Well, if you have the talent, time, and skill, why not!
You can go for customizing or even choose to build a keyboard instead of buying a new one. Building one will give you a personalized keyboard, away from the mainstream one.
Q2. How cheap can you build a custom keyboard?
Ans. In terms of money, a custom keyboard can be well-covered for under $100.
However, this means you will have to compromise on the quality of the components. So, a good quality keyboard can be customized for $200-$400.
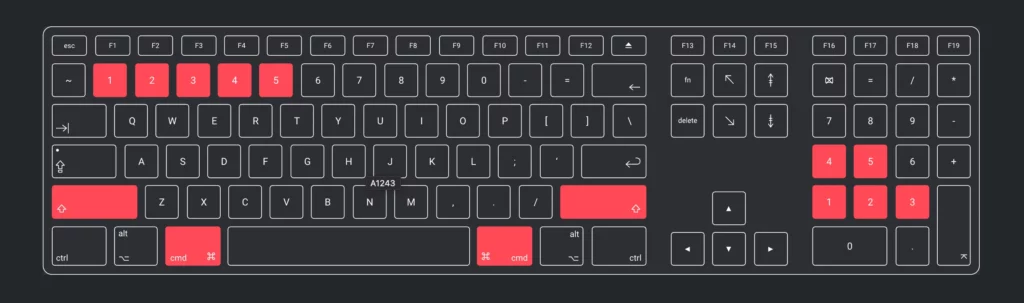
Q3. What is a 65% keyboard layout?
Ans. A 65% keyboard has a devoted set of arrow keys. It also has a row of keys on the right side of the keyboard.
The keys on the extra row are the delete, home, page down, and page up keys.
Q4. Are custom keyboards expensive?
Ans. Yes. Custom keyboards can be expensive, and all for good reasons.
Custom keyboards can elevate the typing and gaming experience when explicitly designed for your needs. A custom keyboard can easily cost you around $400-$500.
Q5. Is building a keyboard hard?
Ans. If it is your first time trying your hands at building a keyboard, then yes, it can be a tedious and hard job. However, you can easily customize this beast once you figure out a way around the process.
The Bottom Line
Cheers! You have just built a custom keyboard as per your requirement. For all the patience and work put in to build a keyboard, it is time to sit back and admire it.
Not only will it look better, but it will sound, feel, and perform better. And yes, this will be better than any keyboard you buy off the market.
So, what are you waiting for?
Start working with your new customized keyboard!