How to Clean a Laptop Keyboard
 Harris Brown
- Updated
- 8 min read
On this page
- What You Need Before You Start
- Quick Daily Cleaning Method
- Deep Cleaning Your Laptop Keyboard
- Dealing with Sticky Keys
- Special Cleaning Tips for Different Problems
- Preventing Future Keyboard Problems
- When to Get Professional Help
- Alternative Cleaning Tools and Methods
- Maintaining Other Keyboard Functions
- Troubleshooting Common Cleaning Problems
- Final Tips for Success
- MacBook-specific cleaning
Shut down the laptop and unplug its charger before cleaning. Use short bursts of compressed air and a lightly dampened microfiber cloth for exposed surfaces. Keep liquid out of the gaps and avoid removing laptop keycaps without model-specific service instructions.
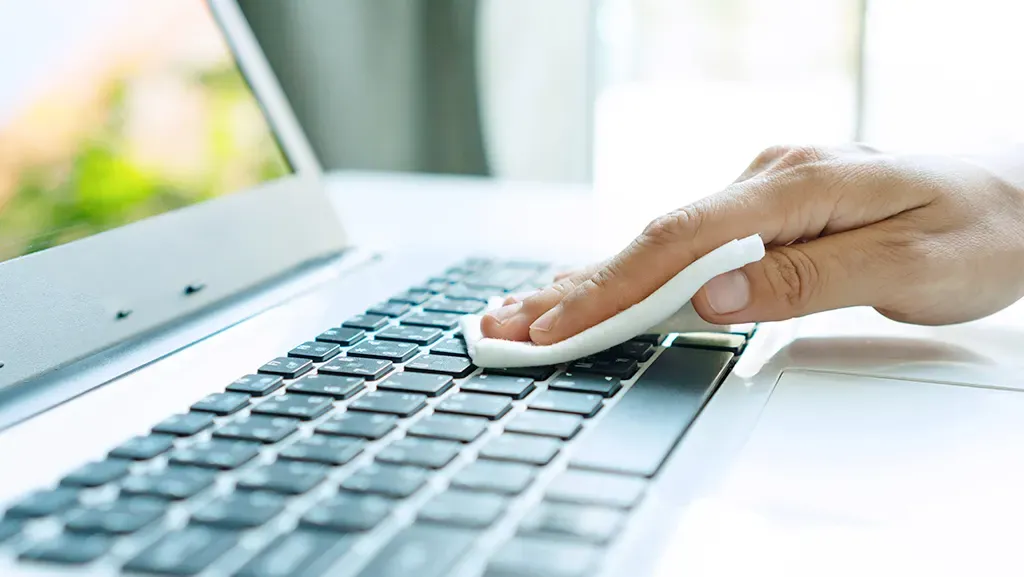
What You Need Before You Start
Get these simple supplies ready:
- Compressed air can
- Cotton swabs
- Rubbing alcohol (70% works best)
- Microfiber cloth
- Small brush (old toothbrush works)
- Paper towels
You probably have most of these at home already. Don’t use water directly on your keyboard. Water can damage the electronics inside.
Turn Off Your Laptop First
Always shut down your laptop completely before cleaning. Unplug the power cord too. This protects your laptop from damage while you clean. It also stops you from accidentally typing random letters while cleaning.
Remove the battery if you can. Some laptops let you take out the battery easily. This adds extra safety while you work.
Quick Daily Cleaning Method
For light cleaning you can do every few days:
Step 1: Flip and Shake
Follow the manufacturer’s instructions for positioning your laptop. Support it securely and gently remove loose debris; do not shake the machine or tap its display.
Deep Cleaning Your Laptop Keyboard
Do this deeper clean once a month or when keys start sticking. Sometimes you might need to unlock keyboard functions that stop working due to dirt buildup.
Remove Loose Debris First
Start with the compressed air method above. Get as much loose stuff out as possible first. This makes the deep cleaning easier and more effective.
Use a small brush to gently scrub around each key. An old toothbrush works great for this. Brush away from the keyboard so dirt doesn’t fall back in.
Clean Individual Keys
Dip a cotton swab in rubbing alcohol. Squeeze out extra liquid so it’s just damp. Clean around each key carefully. Get into the small spaces where dirt hides.
For stubborn spots, let the alcohol sit for a few seconds. Then wipe it away with a clean cotton swab. Don’t use too much pressure on the keys.
Don’t Remove Keys Unless You Must
Do not pry off laptop keycaps unless the manufacturer’s service instructions explicitly allow it. Scissor mechanisms and retaining clips can break. If cleaning the exposed surfaces and compressed air do not help, contact the manufacturer or a repair technician.
Dealing with Sticky Keys
Sticky keys are annoying but fixable. Usually something spilled and dried under the key. Here’s how to fix them:
For Light Stickiness
Spray compressed air around the sticky key. Sometimes this alone fixes the problem. Move the key up and down gently while spraying.
If that doesn’t work, use a damp cotton swab with rubbing alcohol. Clean around the edges of the sticky key. Let it dry completely before testing.
For Serious Stickiness
Do not work liquid or alcohol underneath a laptop key. Persistent stickiness after a spill needs inspection; surface cleaning cannot establish that internal electronics are dry or undamaged.
Special Cleaning Tips for Different Problems
Food Crumbs
Crumbs are the most common keyboard problem. The flip and shake method gets most of them. For stubborn crumbs, use compressed air with short, strong bursts.
Don’t eat over your laptop. It’s the best way to prevent crumb problems. But we all do it sometimes anyway.
Pet Hair and Dust
Pet hair wraps around keys and is hard to remove. Use tweezers to gently pull out visible hair. Don’t dig too deep or you might damage something.
A slightly damp cloth works well for dust. Wipe gently across the key tops. Microfiber cloths grab dust better than paper towels.
Liquid Spills
Shut down and disconnect power immediately. Stop using the laptop and seek model-specific service advice before turning it back on. Do not rely on a fixed drying time or pour cleaner into the key gaps.
Preventing Future Keyboard Problems
Prevention is easier than cleaning. Here are simple ways to keep your keyboard cleaner longer:
- Don’t eat over your laptop
- Keep drinks away from your workspace
- Wash your hands before typing
- Close your laptop when not using it
- Use a keyboard cover if you type a lot
A keyboard cover is a thin, clear sheet that goes over your keys. It protects from spills and dirt while still letting you type normally. They’re cheap and work really well.
Regular Maintenance Schedule
Set up a simple cleaning routine:
- Quick flip and shake: Every few days
- Compressed air cleaning: Once a week
- Surface wipe down: Once a week
- Deep cleaning: Once a month
Regular cleaning prevents big problems. It’s much easier to clean a little bit often than to deal with a really dirty keyboard later.
When to Get Professional Help
Sometimes you need expert help. Call a professional if:
- Multiple keys stop working completely
- Liquid damage is extensive
- Keys are physically broken or missing
- You’re not comfortable doing the cleaning yourself
Don’t try to fix major problems yourself. You might make them worse. A repair shop has proper tools and experience.
If your keyboard has serious connection issues, you might need to troubleshoot beyond just cleaning. Sometimes cleaning helps with various keyboard problems, but other issues might require different solutions entirely.
Signs You Need Professional Repair
Watch for these warning signs:
- Keys that don’t respond at all
- Strange characters appearing when you type
- Keyboard shortcuts not working
- Keys that stay pressed down
These problems usually mean internal damage that cleaning won’t fix. A professional can diagnose and repair these issues properly.
Alternative Cleaning Tools and Methods
If you don’t have compressed air, try these alternatives:
Hair Dryer on Cool Setting
Use a hair dryer on the cool, low setting. Blow air between keys to remove dust and crumbs. Never use hot air as it can damage plastic parts.
Hold the dryer at least 6 inches away from the keyboard. Move it around so you don’t focus heat in one spot.
Sticky Notes for Dust
The sticky edge of a Post-it note can grab dust from tight spaces. Slide the sticky part between keys gently. This works surprisingly well for light dust.
Don’t push too hard or the adhesive might come off and stick to your keyboard. Use light pressure and fresh sticky notes.
Camera Lens Brush
These soft brushes are perfect for keyboards. They’re designed to clean delicate surfaces without scratching. Use gentle circular motions around each key.
Camera brushes often have a small air puffer attached. This gives you cleaning and air removal in one tool.
Maintaining Other Keyboard Functions
While cleaning, you might notice some keyboard features aren’t working properly. Learning how to switch tabs with keyboard shortcuts can help you test if all your keys work correctly after cleaning.
Some laptops have special function keys that control screen brightness or volume. Make sure these work properly after cleaning. If they don’t, you might have gotten moisture in the wrong place.
Testing different keyboard shortcuts after cleaning helps ensure everything works correctly. Try common shortcuts like Ctrl+C and Ctrl+V to make sure your keyboard responds properly.
Troubleshooting Common Cleaning Problems
Keys Feel Different After Cleaning
Sometimes keys feel stiff or different after deep cleaning. This usually means some cleaning solution got under the keys. Let the keyboard dry completely for 24 hours before using it.
If keys still feel wrong, use compressed air again to blow out any remaining moisture. Don’t use the laptop until everything feels normal.
Keyboard Doesn’t Work After Cleaning
If your keyboard stops working completely after cleaning, moisture probably got into the electronics. Turn off the laptop immediately and let it dry for at least 48 hours.
Don’t try to speed up drying with heat. This can cause more damage. Just wait patiently for everything to dry naturally.
Final Tips for Success
Remember these key points when cleaning your laptop keyboard:
- Less is more with liquids
- Take your time and work gently
- Let everything dry completely before using
- Regular light cleaning beats occasional deep cleaning
- When in doubt, get professional help
A clean keyboard improves your whole laptop experience. You might also want to check if you need to turn on keyboard light features after cleaning to make sure all functions work properly.
Learning how to clean laptop keyboard properly saves money and keeps your computer working well. With these simple steps, you can maintain a clean, functional keyboard that will serve you well for years. Start with gentle methods and only use stronger cleaning when necessary. Your laptop will thank you for the care and attention.
MacBook-specific cleaning
Apple recommends compressed air with the notebook held at an angle, moving across the keyboard and then repeating from each side. Keep the can upright. See Apple’s illustrated cleaning instructions for the full procedure. Check the keyboard tester after cleaning to see whether the affected keys respond.

Harris Brown
I'm Harris Brown, an experienced web developer and keyboard enthusiast who creates content about keyboard testing and optimization at keyboardtester.io
Related articles
Caps Lock Stuck On? How to Fix It
Caps Lock stuck on? Learn quick ways to turn it off, the common causes behind a stuck Caps Lock key and how to stop it from happening again.
How to Clean a Keyboard
Clean your keyboard safely, from a quick daily wipe to a full deep clean. The supplies you need and how to deal with sticky or stuck keys.
Keyboard Not Working? Causes and Fixes
Keyboard not typing? Find out why it stopped working and fix it fast, from loose connections and dead batteries to driver and settings problems.